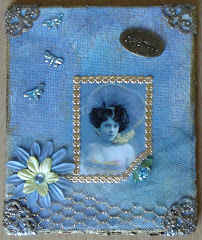
OK, I admit it, I am not a huge fan of Oriental, it has never appealed to me, but after doing a jiggy swap earlier this year, when I had two (*two* !!!) pieces to alter in the Oriental style, I found myself being drawn more towards Eastern images and colours and artefacts, so when a swap came up on UKATC for Oriental ATCs, I jumped right in!
First came backgrounds... and I spied with my little eye some bag ties that I have been hoarding for a while, and wondered... what would happen if I cut them down slightly, glued them onto an ATC and then stuck some faux washi paper over them? This is what happens!

Rather jolly like that effect, and with the direct to paper inking on the backing card, and on some chinese script paper that I glued at the very bottom, I was chuffed with the result. Oh, where did the spots come in?! Well, the paper was in my scraps box and the colours seemed to just match, so I went with it... bit unconventional for Oriental I must admit.
Had downloaded from http://www.digitalcollagesheets.com/ a bottle cap image sheet, so printed off a few to use the Oriental lady image, which I glued into a squished bottle cap (thank you Merlin - that is what I call my Wizard die-cutting machine by the way!)

Finishing touches? Wire and beads, a word, some german scrap and voila - I did the Oriental (and it wasn't painful at all!)


 ...under the sea!


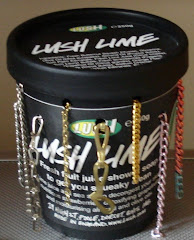
SP_A0109.jpg) Doh! The skewer lived to tell the tale, and the beads I created on it have since been used on some ATCs. As for the rolling pin... I am afraid it had to be consigned to the dustbin (sorry nephew of mine, I will get you another rolling pin for your playdoh ready for your next visit!)
Doh! The skewer lived to tell the tale, and the beads I created on it have since been used on some ATCs. As for the rolling pin... I am afraid it had to be consigned to the dustbin (sorry nephew of mine, I will get you another rolling pin for your playdoh ready for your next visit!)


SP_A0067.jpg)


