Showing posts with label paint dabbers. Show all posts

Sunday, 20 July 2008

I'm here!

Yesterday I moved into my new place - gulp! At the risk of sounding like I am giving an "Oscar winning thank you performance" I must say ta very muchly to Mumsy and Freaky Deaky Dad, who helped me move most of my stuff, not to mention helping me to spring clean from top to bottom and shift furniture around - rewarded them with a Chinese takeaway!

Now, here's a question for you...

Q: What is the most important part of Freaky Deaky Crafty Chick's home?
A: Craft Space!!!

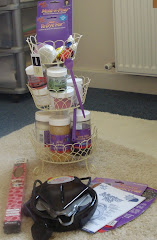
Here is the "before picture" - taken first thing this morning... oh the jumble!

Then along came my fairy godmother in the shape of my Freaky Deaky Crafty Friendie, and with her magic wand and my fairy dust (plus rather a lot of shuffling things around and re-jigging me bits and bobs) we turned an area of my lounge into this...

Ta da!!!

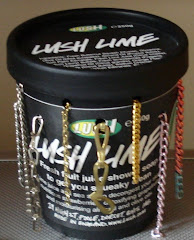
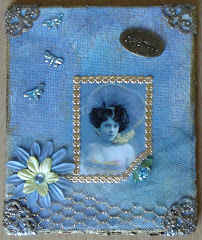
And do you know what? My FDCF bought me a giftie, well she bought it over here, but she actually created it herself - wow! I was sooooooo chuffered; not only had she taken the time to make me an stonking altered canvas, but she even wrote the words herself - I think I shall start calling her my Uber Talented Freaky Deaky Crafty Friendie!

"A time to craft, a time to play, A time to art your heart away,

A time to get messy, and time to have fun, a time to art until you are done,

New techniques, new tools to use, experiment with them, use your creative muse..."

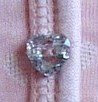
After receiving such a wonderful gift, and a craft space ready to rumble, how could I resist having a play?! So I made a start on an altered coaster swap for Advanced Artist Trading. Using a technique from Bernie Berlin's book, I created resist backgrounds using acrylic paints, paint dabbers, clear heat embossing with rubber stamps, more paint (dry brushed on) and then applied a hot iron...

For some reason, I didn't get quite the right effect on the top R coaster, and the bottom R one was naughty and some of the actual chipboard of the coaster came off after ironing (iron too hot?). That said, the ones on the left hand side I am well chuffed with :)

Theme for the swap is numbers, so to include my favourite or a significant no. on each coaster. So what's the magic no.? That'd be telling!

Wednesday, 9 July 2008

Inspired by Primark?!

Backtracking - 30th June 2008

I had a mega hectic day yesterday (I made it to London to see my mate, thanks to Freaky Deaky Dad's support) and was introduced to the world of Primark. Totally bargainous store, but mega busy and really too much, so we soon retreated to Starbucks!

Today, I made use of the labels that came of the pair of cargo trousers I bought (was well surprised they had trousers long enough for my legs in such a cheap shop!) and I made a card :)

Been ages since I actually made a card, as for months all I have really done is ATCs and altered art bits and bobs. It wasn't too painful though to make my brain think on a bigger scale.

The bits from the clothing tags are the ripped rough brown paper, and the length of twill that I have attached with an eyelet over the top. I stitched down the left and right side of it using wire. Used backing papers that have been kicking around for a while, ripped it, and embossed the torn edge with one of my de-lovely B-Muse embossing powders. Got inky and used direct to paper in various colours over the rest of the card to co-ordinate, then finally used a wooden heart and wrapped wire round, adding some coils top and bottom, and 3 stitched crosses onto the right hand corner of the card, as finishing touches. It was fun!

Note to self: make cards more often!

But... I couldn't resist making an ATC too!!!

Monday, 30 June 2008

Background Bonanza

Backtracking - 13th June 2008

Friday 13th - not unlucky for crafty chicks! Went bonkers with backgrounds, along with Mumsy, and look what we made! Got out some canvas, acetate and textured wallpaper as bases.

To add colour we used:

  • Adirondack paint dabbers
  • luna lights
  • regular acrylic paints
  • chalk dew drop inkpads

To add texture we used:

  • string
  • plastic forks (drag through/scrape the acrylic paints - try it! Makes cool patterns)
  • toothbrushes (old ones!)
  • sponges

The paint fumes sent Mumsy quite doo-lally (either that or it was spending time with Freaky Deaky Crafty Chick that was the cause of her delirium!!!) It was a stonking afternoon, don't get many of those round here so will remember it always :)