
And Now For Something A Little Bit Different...

To Those That Dream There is no Such Place as Faraway
Ahhhhhh! There was no stopping me then. I grabbed the 4 jumbo playing cards (an extra swap currently running on UKATC) sent to me by Paula, and started creating backgrounds and generally getting all painty!
Backgrounds for Jumbo ATC Swap
On the other 2 backgrounds (on the right hand side of the piccie above) I used watered down acrylic paints brushed on over a layer of gesso (just to prime) and then I scrunched up clingfilm and placed it over the top. When I lifted off the clingfilm, I wanted a bit more of a sheen, so a added a few drops of luna lights and repeated scrunched clingfilm part. Looks kinda marbled, pretty cool! It's amazing what you can do with Morisson's mucho cheap clingfilm!


Ta da!!!
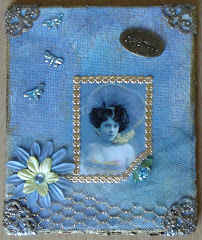
And do you know what? My FDCF bought me a giftie, well she bought it over here, but she actually created it herself - wow! I was sooooooo chuffered; not only had she taken the time to make me an stonking altered canvas, but she even wrote the words herself - I think I shall start calling her my Uber Talented Freaky Deaky Crafty Friendie!
"A time to craft, a time to play, A time to art your heart away,
A time to get messy, and time to have fun, a time to art until you are done,
New techniques, new tools to use, experiment with them, use your creative muse..."
After receiving such a wonderful gift, and a craft space ready to rumble, how could I resist having a play?! So I made a start on an altered coaster swap for Advanced Artist Trading. Using a technique from Bernie Berlin's book, I created resist backgrounds using acrylic paints, paint dabbers, clear heat embossing with rubber stamps, more paint (dry brushed on) and then applied a hot iron...

For some reason, I didn't get quite the right effect on the top R coaster, and the bottom R one was naughty and some of the actual chipboard of the coaster came off after ironing (iron too hot?). That said, the ones on the left hand side I am well chuffed with :)
Theme for the swap is numbers, so to include my favourite or a significant no. on each coaster. So what's the magic no.? That'd be telling!


I was rather chuffed with what I made! Now... need to finish them off! I have rather a lot of unfinished symphonies at the moment (it's a habit of mine) but these I want to finish in particular, for the swap on UKATC, so watch this space!

After priming with gesso, I used 3 shades of Adirondack paint dabbers to colourise the box all over, in a random fashion, til I had something which I was satisfied with. Then I stamped using Stazon and my favourite Crafty Individuals rubber stamps (text, friends in Paris, Paris postmark) onto tissue paper, and used modge podge to apply them onto the lid of the box, layering and overlapping.

Not actually very happy with the way the word "friends" cannot be seen easily at all. Will figure that out another day, in fact, I will probs end up covering it up with something. But what..?

So crafter's, if you're out there, take heed - do not craft with embossing powders (or glitters for that matter!) when you have a cold! You're only asking for a room to get covered in sparkles and powders, and you know what that means - hoovering up!
N.B. No backgrounds were sneezed upon during the making of these canvases.

All the backgrounds were done on canvas, being such a canvas freaky at the mo, what else would I use?! Kept them pretty plain and simple, only using one or two colours of acrylic paints, stamping one of my new-ish Paperartsy border stamps on the left hand side. Then I simply added a little bit of mulberry paper across the bottom, and created an embellishment using the bottle tops, images, a teeny pearl flower, diamond glaze, and some good old wire and beads!

Now, they needed a finishing touch. Something... I don't know what! I was going over to see my Freaky Deaky Friendie and after much conflab, she gave me 3 words from a sheet of doo-dads she had, in very cool colours and they matched perfectly. I have now added these to my list of must-haves!

Thank you Freaky Deaky Friendie :)

I took a boring frame that cost me a pound (bargainous!) and used a pallette knife to spread Texture Paste over it... bit like icing a cake! Then I took a plastic fork and plopped it over the paste to create a kind of spiked, wavy effect...


Lie back and r-e-l-a-x...! :D

Friday 13th - not unlucky for crafty chicks! Went bonkers with backgrounds, along with Mumsy, and look what we made! Got out some canvas, acetate and textured wallpaper as bases.
To add colour we used:
To add texture we used:

The paint fumes sent Mumsy quite doo-lally (either that or it was spending time with Freaky Deaky Crafty Chick that was the cause of her delirium!!!) It was a stonking afternoon, don't get many of those round here so will remember it always :)

SP_A0067.jpg)
| My Birthdate: August 16 |
 You're incredibly introverted and introspective. You live inside your head. You spend a lot of alone time meditating and thinking. People see you as withdrawn, and at times they are right. You are caring and deep, but it may be difficult for you to show this side of yourself. Your strength: Your original approach to thinking Your weakness: You tend to shy away from others Your power color: Pale blue Your power symbol: Wavy line Your power month: July |
| My Brain's Pattern |
 Your mind is a multi dimensional wonderland, with many layers. You're the type that always has multiple streams of though going. And you can keep these thoughts going at any time. You're very likely to be engaged in deep thought - and deep conversation. |
| You Are 1: The Reformer |
 You're a responsible person - with a clear sense of right and wrong. High standards are important to you, and you do everything to meet them. You are your own worst critic, feeling ashamed if you're not perfect. You have uncompromising integrity, and people expect you to be fair. At Your Best: You are hopeful, honest, and inspiring. You bring out the best in humanity. At Your Worst: You are intolerant, judgmental, and picky. Your Fixation: Resentment Your Primary Fear: Being corrupt. Your Primary Desire: To be good. Other Number 1's: Al Gore, Martha Stewart, Gandhi, Celene Dion, and Spock from Star Trek. |
| What My Name Means |
 You are well rounded, with a complete perspective on life. You are solid and dependable. You are loyal, and people can count on you. At times, you can be a bit too serious. You tend to put too much pressure on yourself. You are usually the best at everything ... you strive for perfection. You have the classic "Type A" personality. You are very intuitive and wise. You understand the world better than most people. You also have a very active imagination. You often get carried away with your thoughts. You are prone to a little paranoia. You sometimes go overboard in interpreting signals. You are friendly, charming, and warm. You get along with almost everyone. You work hard not to rock the boat. Your easy going attitude brings people together. At times, you can be a little flaky and irresponsible. But for the important things, you pull it together. You are a naturally creative person. Ideas just flow from your mind. A true chameleon, you are many things at different points in your life. You are very adaptable. You tend to be pretty tightly wound. It's easy to get you excited... which can be a good or bad thing. You have a lot of enthusiasm, but it fades rather quickly. You don't stick with any one thing for very long. You have the drive to accomplish a lot in a short amount of time. Your biggest problem is making sure you finish the projects you start. You are wild, crazy, and a huge rebel. You're always up to something. You have a ton of energy, and most people can't handle you. You're very intense. You definitely are a handful, and you're likely to get in trouble. But your kind of trouble is a lot of fun. You are influential and persuasive. You tend to have a lot of power over people. Generally, you use your powers for good. You excel at solving other people's problems. |


