Showing posts with label b-muse. Show all posts

Monday, 1 September 2008

Bootiful Backgrounds! Eye Candy!

With one background done for the Beautiful Background swap on UKATC (see webbing spray post!) and the option of doing another, well, how could I resist the urge to get arty farty, messy, gluey, painty... again!

Playing with Gouache Paints

My base card was cream (not that you would know that looking at it now!) I brushed stripes of yellow gouache paint in a random fashion, then dry brushed over the stripes in the opposite direction to pull the paint out. Repeated this with green paint too, leaving space for my third colour - purple! This I blobbed on and then used a round noodle brush (thanks FDF!) to take the colour across the entire background. Then I doodled over with pearly stuff, but didn't like the effect. So I took me trusty expired credit card and smooshed the liquidy-pearly stuff over the entire page.

Thought - aha! Still wet, sprinkle in embossing powders and see what happens! So I chose a couple of different colours of B-Muse embossing powders and sprinkled them over random parts of the card. Turned on my heat gun, and not only did the emobssing powders melt into the pearly stuff, but where there were no embossing powders, it bubbled up slightly - ooooh!

Close Up!

Anyway, both this background page and my webbing spray background sheet have been chopped into 9 pieces, 8 of which went to UKATC for the swap, 1 of which was mine to keep. This was an anything goes swap, so just look at what eye candy I got in return!!!

WOW!!!

Wednesday, 20 August 2008

Webbing Spray!

Been playing with my webbing spray! Black lightweight cardstock, a spritz of webbing spray, and shoot gold embossing powder over, tip off excess and heat. Repeated this with raspberry dazzle embossing powder, then spritzed entire sheet lightly with a mica pigment based spray. Voila!

First Time Webbing Spray

Could be a potential background for a swap running on UKATC...

Friday, 1 August 2008

Coasting!!!

Finally my finished Altered Coaster for a swap on Advanced Artist Trading Cards have been completed and sent off in the post! Backgrounds were all done using Bernie Berlin's background technique "emboss resist", then, the theme being numbers, I had to pick my fave no... 2! (no rude jokes please!)

The harlequin background on this coaster gave me a great starting point, and it was easy to choose an image for it - this one is stamped onto acetate, and I had layered 3 strips of mulberry paper underneath, to add a bit of depth to the image. I cracked open a packed of "diamond" Ranger pop outs that I have been hoarding for some time, and used B-Muse embossing powders on them, and then swiped round the edge of the coaster with versamark and used the same colour embossing powder as I had done on the pop outs. Beaded chain around my no.2 and around the diamonds, plus a few diamante stars, and this one was completed!

2 Little Angels

The next coaster was a bit tricky-wicky, as it was the first time I had used my crop-a-dile to attach organza ribbon onto a surface with eyelets. I didn't want to spoil ye olde coaster, and fortunately, after a bit of faffing, I got the effect I was after. Added some velvet ribbon too, for a bit of touchy feely-ness. The no.2 and edge of the coaster have B-Muse embossing powders on them, and the no. is attached with 4 teeny tiny "screw head" brads. I alcohol inked a round frame from The Fruit Pixie, and attached it over my chosen image with brads. A touch of bling was needed to finish off, so I applied gems, beads and wire to complete the coaster.

2 Hearts Beating as 1

This is my secone fave coaster out of the four I made. Image is crafty Individuals, a little ric rac down one side (thank you FDF for your advice!) and interlocked the image into a die cut swirl that I had embossed with, yup, you got it, B-Muse embossing powders (and the edge of the coaster too!) Alcohol inked a washer and a button, using the washer to frame my no. and the button as an embellishment. Completed my chosen phrase "2gether" (not good English I know - but I think it looks good on arty farty stuff) The finishing touch was a flower from a sheet of prima flowers sent to me as an RAK by a member of the group ATC Addicts R Us (thank you!)

2-gether

My most favourite coaster of all... really hard to part with this one, yet I didn't like it at first! How odd... Anyway, attached some vintage lace using some large eyelets, tucking my image (Crafty Individuals) underneath on one side. Added my phrase "IT TAKES" and my no. 2, and used gold trim under both the no. and the image. Used some pink gems to create a corner on the top right, attach these with wire (unusual gems these, they have 2 holes on the top). Finishing touch, attaching some musical note charms with wire, twisted this way and that.

It Takes 2 (to Tango)

If no one wants this one in the swap... I wonder if I could have my own back?!

Wednesday, 9 July 2008

Inspired by Primark?!

Backtracking - 30th June 2008

I had a mega hectic day yesterday (I made it to London to see my mate, thanks to Freaky Deaky Dad's support) and was introduced to the world of Primark. Totally bargainous store, but mega busy and really too much, so we soon retreated to Starbucks!

Today, I made use of the labels that came of the pair of cargo trousers I bought (was well surprised they had trousers long enough for my legs in such a cheap shop!) and I made a card :)

Been ages since I actually made a card, as for months all I have really done is ATCs and altered art bits and bobs. It wasn't too painful though to make my brain think on a bigger scale.

The bits from the clothing tags are the ripped rough brown paper, and the length of twill that I have attached with an eyelet over the top. I stitched down the left and right side of it using wire. Used backing papers that have been kicking around for a while, ripped it, and embossed the torn edge with one of my de-lovely B-Muse embossing powders. Got inky and used direct to paper in various colours over the rest of the card to co-ordinate, then finally used a wooden heart and wrapped wire round, adding some coils top and bottom, and 3 stitched crosses onto the right hand corner of the card, as finishing touches. It was fun!

Note to self: make cards more often!

But... I couldn't resist making an ATC too!!!

UTEE or not UTEE?!

Backtracking - 27th June 2008

I spent the day playing with UTEE, using playing cards as my base (ones sent to me as an RAK by a member of ATC Addicts R Us) - a couple of layers of UTEE, then quickly sprinkled over some of my new B-Muse embossing powders in....
  • aged copper
  • metallic marmalade
  • raspberry dazzle
  • creamy mauve metallic

(don't they have fab names?!)

I stamped into the molten UTEE using some new corner stamps I have been dying to try out (a gift from Crafty Chick to Crafty Chick from That's Crafty Online when I was stocking up on adhesives!)

Then I took some teeny ballerina images and stuck them into a couple of frame charms I have been saving for a special occasion - I used UTEE to glaze over, and sprinkled in some accent beads (this whole process will be so much easier when I get my melt pot - roll on 16th August!)

Used wire and beads to create a dangly to attach the ballerina pendant charms I had made, and added a bead drop just because you can never have too many beads on a project! Then I glitzed up even more by adding teeny weeny gems in various parts of the impressions that had been made by stamping into the UTEE.

This one I gave to my Freaky Deaky Friendie...

...and this one is for *me*

More With UTEE...

I couldn't accept the playing cards RAK without sending something in return that I had created on the card/s to say thank you, so more UTEE was flying around the room and I played around again, this time, trying to let the diamonds on the playing cards show through, so I went easy on the coloured embossing powders when I sprinkled them over my layers of UTEE - two of the embossing powders are scented...

  • baby powder (light pink)
  • strawberry (red)

...I wonder if they still smell after travelling to their recepient? Let me know if you are reading this guys! They certainly left a nice niff in the craft room :)

This time I inked up my stamps with stazon so as to make very bold impressions - ballerina stamp and distressed harlequin stamp - so me it looked like the ballerina was dancing on diamonds so that was what I titled these ATCs...

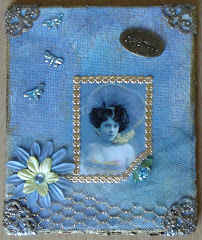
A finishing touch was required (I mean, how can I make an ATC with no embellishments?!) so i sought out 2 sizes of square brads, used embossing powders to make them fit in with the colours I had already created, and attached them so they looked like diamonds. Voila! I loved the colours on the second ATC so much that I submitted it to ATC Addicts R Us for the "My Favourite Colour" Swap, and got this lovely one in return:

I will credit the artist, if they are OK with that :)