Showing posts with label backgrounds. Show all posts

Monday, 1 September 2008

Bootiful Backgrounds! Eye Candy!

With one background done for the Beautiful Background swap on UKATC (see webbing spray post!) and the option of doing another, well, how could I resist the urge to get arty farty, messy, gluey, painty... again!

Playing with Gouache Paints

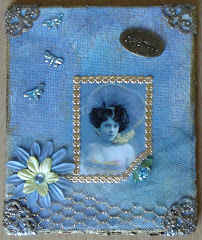
My base card was cream (not that you would know that looking at it now!) I brushed stripes of yellow gouache paint in a random fashion, then dry brushed over the stripes in the opposite direction to pull the paint out. Repeated this with green paint too, leaving space for my third colour - purple! This I blobbed on and then used a round noodle brush (thanks FDF!) to take the colour across the entire background. Then I doodled over with pearly stuff, but didn't like the effect. So I took me trusty expired credit card and smooshed the liquidy-pearly stuff over the entire page.

Thought - aha! Still wet, sprinkle in embossing powders and see what happens! So I chose a couple of different colours of B-Muse embossing powders and sprinkled them over random parts of the card. Turned on my heat gun, and not only did the emobssing powders melt into the pearly stuff, but where there were no embossing powders, it bubbled up slightly - ooooh!

Close Up!

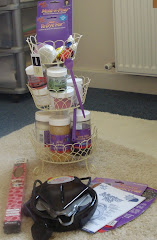
Anyway, both this background page and my webbing spray background sheet have been chopped into 9 pieces, 8 of which went to UKATC for the swap, 1 of which was mine to keep. This was an anything goes swap, so just look at what eye candy I got in return!!!

WOW!!!

Wednesday, 20 August 2008

Webbing Spray!

Been playing with my webbing spray! Black lightweight cardstock, a spritz of webbing spray, and shoot gold embossing powder over, tip off excess and heat. Repeated this with raspberry dazzle embossing powder, then spritzed entire sheet lightly with a mica pigment based spray. Voila!

First Time Webbing Spray

Could be a potential background for a swap running on UKATC...

Tuesday, 12 August 2008

More Than Inky Layers and Flutterbies to Go

Seemed to be on a bit of a crafty roll today - rather unexpectedly I must say! :p

I had some backgrounds I had made a few weeks ago whilst dabbling with a few Bernie Berlin techniques - these particular ones are "inky layers" but now I have added to them!

I stamped images from Tanda Stamps retro plate onto acetate and attached them to the backgrounds using a few spots of diamond glaze. I also stamped out some phrases onto mountboard to add to each ATC.

"So Stylish" - added 3 eyelets and wove some fibers through, and glued on a teeny weeny metal rose embellishment.

So Stylish

"You Got Style" - added a strip of fibers down one side and a string of pearls. Glued on some tiny pearls to make a necklace, and also added a teeny weeny metal rose embellishment in her hair.

You Got Style

"Lips, Cheeks, Eyes" - wound some lilac fibers round the left hand side a couple of times to add a bit of texture. Glued on another of those fab teeny weeny rose embellishments (into her hair again!) and made a necklace on her by gluing on teeny weeny flat-backed pearls. I think this one is my fave!

Lips, Cheeks, Eyes

With my Gothic Arches all complete and good to go, I decided to turn by my lickle beaded butterfly into a pin/brooch and enclose him as an RAK for the Guest Hostess Kathleen. Hope she likes it!

I feel it is time that butterflies flew away though, I have had them on the brain, which will slip into the drain if I do any more butterfly related crafting in the not too distant future!

Thursday, 7 August 2008

The Holiday is Over; 1 down 1 to go!

Hooray, hooray, it's a holi-holi-day! Done and dusted, 4 Holiday/Vacation Themed ATCs, 3 of which will go in for the ATC Addicts R Us themed swap for August. The other one... aha!

Anyways, to each ATC I chose an image from either the "funnies" or "travel" ATC paper pads, adding colour using direct to paper technique, to lift them up off the background. Also added 4 fancy corners to make each image look like a snapshot from a holiday photo album.

Got Tuna?

Attached the phrase "Got Tuna?" with mini micro brads, adding a fish charm (thank you FDF!) which I had alcohol inked. Final touch, a wavy peel off (yup, you read that right, a *peel off*!!!)...

Memories

Added an alcohol inked metal plaque - memories - and some rustic looking gold glass chips, to create the effect of a pebble beach...

Dip Your Toe In

Added a windsurfer charm which had been alcohol inked, attaching it with a brad. Another wavy line peel off (am I feeling alright?!) and this one was done!

The Gene Pool

My favourite I think - attached an alcohol inked sea conch charm using a mini micro brad, and added the phrase "The problem with the gene pool is that there is no lifeguard" - the final touch was a few of those rustic gold glass chips.

And, hip hip hooray, 1 down 1 to go - I have completed one of my gothic arches. I was drawn to them as soon as I woke up, so took advantage and got cracking with finishing one off.

So what have I added to what was once a mere background? 2 stamped images of teeny weeny flutterbies in spring pansy, coating the images with diamond glaze. I also stamped teeny weeny swirls in gold, attached a wire coil/ribbon to the bottom left hand corner, then, using wire, attached tiny lilac sequin flowers all the way round the arch so they kinda hang off - added a bit of ribbon to one of them. I bedazzled up the dark butterfly images on the backround paper using, those things I can never remember the name of... accent beads!!! I also gave both of these butterflies antennae (could resist!) Finally I added my alcohol inked metal butterfly and voila!

The Master Calls a Butterfly

Wednesday, 6 August 2008

We're All Going On a... Summer Holiday (Vacation!) - Uh oh... emergency glue supply required!

Last night I made a start on some backgrounds for a themed swap on ATC Addicts this month - Holidays/Vacations. I already had an idea to collage all the foreign postage stamps I had been saving up, so grabbed my glue stick and was off!

Holiday/Vacations Backgrounds (stage 1)

When I woke up this morning, I realised I couldn't really continue with these ATCs as I really, really needed a glue stick and mine had completely run out the night before. Doh! So I quickly went online to order a Tombow (best glue stick in the world... ever!) but needed something ASAP so in the interim, I popped to WHSmith and got a pink (yup, that's right, pink!) pritt stick. Turned out not to be the hottest glue in town, but hopefully my Tombow will arrive in a day or two, and besides, managed to grab the latest copy of Craft Stamper whilst Pritt Stick Shopping :)

A Pink Pritt Stick - Whatever Next?!

For those of you interested in the pritt stick, it goes on clear, dries clear etc. Anyhoo, moving on...

Over stamped postage stamp backgrounds using teal stazon and a mini postcard stamp (prima) and a gold inkpad and an ink pen stamp (argh, manufacturer of that stamp?! Elusive Images?) Then with my pinker than pink pritt stick I could glue on ripped blue mulberry paper, and then attached green netting (not sure where that came from - perhaps some fruit that was bought by Mumsy and has now been recycled into craft supplies!)

Holiday/Vacations Backgrounds (stage 2)

That was it from my crafting brain for today, I hope to get more out of it tomorrow!

Thursday, 24 July 2008

New Address Cards and My Bunny Wabbit

I felt uber creative this evening (and I couldn't sleep) so I made a set of new address cards to send to various relatives. Kept them simple - stamped backgrounds (on the left hand side ones I have used Prima stamps, on the right hand side ones Crafty Individuals) Matted and layered onto 2 further pieces of card picking out colours from the skeleton leaves used on the front. I have had those kicking around for a good couple of years, not really knowing what to do with them, so took this opportunity to break open the packet and use them! Stamped "new address" onto vellum and attached over with lickle flower brads. Very therapeutic!

New Address Cards

I may have had to leave (not so) little Oscar behind with my parents, but I have a new pet (well, ish!) A bunny wabbit - I have named him Robbie) keeps coming out early morning and early evening to chomp at the grass outside my lounge window. Today, however, he actually was out during the day (maybe because it was so hot?) and he lounged around on the grass for a few hours under some little bushes...

Robbie the Rabbit


He's not dead, just sleepy... aaaahhhhhhh!

Wednesday, 23 July 2008

Nail Varnish Backgrounds Fluttering By!

Finally turned those nail varnish backgrounds from 4th July...

http://freakydeakycrafter.blogspot.com/2008/07/nail-varnish-high-and-somewhere-to-be.html

... into completed ATCs!

I added gorge flutterby sequins which I had embellished myself with beads...

... and a swirly wirly die cut (courtesy of my craft penpal from the U S of A) ...

... then I stuck gems onto the die cuts to lift them off the backgrounds ...

... and used my new mini alphabet stamps from The Fruit Pixie to stamp either "soar" or "fly fly away" ...

I am liking flutterbies at the mo! Really excited as there is a butterfly themed Gothic Arch swap coming up on ATC Addicts in July/Aug... yay! :D

Sunday, 20 July 2008

I'm here!

Yesterday I moved into my new place - gulp! At the risk of sounding like I am giving an "Oscar winning thank you performance" I must say ta very muchly to Mumsy and Freaky Deaky Dad, who helped me move most of my stuff, not to mention helping me to spring clean from top to bottom and shift furniture around - rewarded them with a Chinese takeaway!

Now, here's a question for you...

Q: What is the most important part of Freaky Deaky Crafty Chick's home?
A: Craft Space!!!

Here is the "before picture" - taken first thing this morning... oh the jumble!

Then along came my fairy godmother in the shape of my Freaky Deaky Crafty Friendie, and with her magic wand and my fairy dust (plus rather a lot of shuffling things around and re-jigging me bits and bobs) we turned an area of my lounge into this...

Ta da!!!

And do you know what? My FDCF bought me a giftie, well she bought it over here, but she actually created it herself - wow! I was sooooooo chuffered; not only had she taken the time to make me an stonking altered canvas, but she even wrote the words herself - I think I shall start calling her my Uber Talented Freaky Deaky Crafty Friendie!

"A time to craft, a time to play, A time to art your heart away,

A time to get messy, and time to have fun, a time to art until you are done,

New techniques, new tools to use, experiment with them, use your creative muse..."

After receiving such a wonderful gift, and a craft space ready to rumble, how could I resist having a play?! So I made a start on an altered coaster swap for Advanced Artist Trading. Using a technique from Bernie Berlin's book, I created resist backgrounds using acrylic paints, paint dabbers, clear heat embossing with rubber stamps, more paint (dry brushed on) and then applied a hot iron...

For some reason, I didn't get quite the right effect on the top R coaster, and the bottom R one was naughty and some of the actual chipboard of the coaster came off after ironing (iron too hot?). That said, the ones on the left hand side I am well chuffed with :)

Theme for the swap is numbers, so to include my favourite or a significant no. on each coaster. So what's the magic no.? That'd be telling!

Wednesday, 9 July 2008

Ironing is Fun!

Backtracking 8th July 2008

It's amazing what you can do with an iron - they aren't just for laundry don't you know! I hadn't used my fantasy fibers/films since I took part in a workshop (like, 2 years ago!) and when I was watching QVC the other day there was Leonie demonstrating them, which gave me an itch I had to scratch and so I got out my fantasy fibers and fantasy films to have a play!

Knowing I had some ATCs to get done, I started with my fantasy fibers and created some backing papers using the fantasy fibers, a few different colours, and sandwiched some sequins in between the layers.

I used star and fairy wand sequins, as I want to use these backgrounds for a themed swap of "Shakespeare" being run by our guest hostess at ATC Addicts R Us (my take on it being fairies/Midsummer Nights Dream)

I had some scraps left over so of course could not resist playing around to see what happens when you iron all your scraps!

This is fantasty film, fantasy fibers, round sequins, and a sprinkling of teeny tiny prima flowers sandwiched in-between.

This is fantasy film with a tiny sprinkling of fantasy fibers, a few prima flowers and a piece of a pink heather embellishment that has been hanging around a while, waiting to be put to good use.

Well, who wants to iron bed sheets and trousers and tops when you can iron for craft purposes!!!

Nail Varnish High and Somewhere to Be :)

Backtracking - 4th July 2008

OMG! I am high because of the nail varnish backgrounds I have been making today, or because of the news I received?! I have been offered a flat!!! Totally unexpected, completely out of the blue, but after the initial shock, I had a feeling of comfort in the knowledge that soon, I will have "somewhere to be"...

Enough about that though, onto important stuff like getting crafty! Purely experimentally, I dropped a few blobs of 2 or 3 different colours of nail varnish onto card, placed another piece of card on top, squished and smooshed them together (very technical terms lol!), the result being a kind of marbled effect!

But my goodness did it reek of nail varnish - bleurgh! Rather too much so I had to consign these backgrounds to another room in the house whilst they dried and the smell eased off!!!

Oooh... I got a flat I got a flat I got a flat!!!

*bump back down to earth*

Yikes, I don't have hardly anything to furnish a flat... I shall have to perhaps camp out on the living room floor with my craft stuff and that's it! Anyone who wishes to make a donation to the "Furnish Jo's Flat" fund, please get in touch!!! :p

Monday, 30 June 2008

Background Bonanza

Backtracking - 13th June 2008

Friday 13th - not unlucky for crafty chicks! Went bonkers with backgrounds, along with Mumsy, and look what we made! Got out some canvas, acetate and textured wallpaper as bases.

To add colour we used:

  • Adirondack paint dabbers
  • luna lights
  • regular acrylic paints
  • chalk dew drop inkpads

To add texture we used:

  • string
  • plastic forks (drag through/scrape the acrylic paints - try it! Makes cool patterns)
  • toothbrushes (old ones!)
  • sponges

The paint fumes sent Mumsy quite doo-lally (either that or it was spending time with Freaky Deaky Crafty Chick that was the cause of her delirium!!!) It was a stonking afternoon, don't get many of those round here so will remember it always :)