Showing posts with label ATCs. Show all posts

Monday, 1 September 2008

Bootiful Backgrounds! Eye Candy!

With one background done for the Beautiful Background swap on UKATC (see webbing spray post!) and the option of doing another, well, how could I resist the urge to get arty farty, messy, gluey, painty... again!

Playing with Gouache Paints

My base card was cream (not that you would know that looking at it now!) I brushed stripes of yellow gouache paint in a random fashion, then dry brushed over the stripes in the opposite direction to pull the paint out. Repeated this with green paint too, leaving space for my third colour - purple! This I blobbed on and then used a round noodle brush (thanks FDF!) to take the colour across the entire background. Then I doodled over with pearly stuff, but didn't like the effect. So I took me trusty expired credit card and smooshed the liquidy-pearly stuff over the entire page.

Thought - aha! Still wet, sprinkle in embossing powders and see what happens! So I chose a couple of different colours of B-Muse embossing powders and sprinkled them over random parts of the card. Turned on my heat gun, and not only did the emobssing powders melt into the pearly stuff, but where there were no embossing powders, it bubbled up slightly - ooooh!

Close Up!

Anyway, both this background page and my webbing spray background sheet have been chopped into 9 pieces, 8 of which went to UKATC for the swap, 1 of which was mine to keep. This was an anything goes swap, so just look at what eye candy I got in return!!!

WOW!!!

Wednesday, 13 August 2008

What's Black and White and...

Q: What is black and white, white and black, black and white?
A: A zebra caught in a revolving door!!!

OK, apologies for the really poor attempt at humour there, but it was the only black and white joke I could think of right now!

Swiftly moving on, Black and White is a theme for ATC Addicts R Us this month, so I took the bull by the horns and got creating! I already had some stamped acetate images ready with this swap in mind (Crafty Individuals and some other company I cannot remember right now!)

First ATC, Flower Girl, I cut along the shaped side of the image and attached a strip of lace paper (see the texture peeking out the right hand side?) I then used diamond glaze to glue the image onto a piece of DCWV backing paper (black and white stack - sunflowers) hoping that the petals of the sunflowers look like layers of her dress... does that work?

Kind of... anyways, I inked the edges and matted and layered onto white and then black card. To embellish, I used versamark and black and white embossing powders to colorise 2 die cut flowers, and layered them up on the bottom right hand corner, attaching a pearl flower in the centre and a mini micro brad. I added a teeny weeny pearl flower to the image in her hair, and a teeny weeny fabric flower to her dress - onto this one I popped a black gem, and then to finish I attached a few more gems in the centre of the flowers on the stamped image.

Flower Girl

This next ATC, Girls Night Out, was such fun to make! I placed the image over some handmade paper and some lace - I think it looks really cool, like the lace is the top of the girls' dresses! All this needed was matting and layering and a few finishing touches. I added wire and beads down the left hand side, and a tiny star button up the top. Melikes! (I don't say that often!!!)

Girls' Night Out

Actually, melikes this next ATC too (what happened to self doubt?! Maybe it decreases the nearer you get to 30?!) I love this Pierrot image, it seemed to fit perfectly within the black and white theme. I layered it onto handmade paper, then onto black card, adding 3 brads over buttons on the image to help hold the acetate in place. I attached the word "Pierrot" using diamond glaze, and embellished with a pinwheel sequin, pearl flower and mini micro brad. The harlequin style lace down the left hand side adds a bit of texture and interest!

Pierrot

Tuesday, 12 August 2008

More Than Inky Layers and Flutterbies to Go

Seemed to be on a bit of a crafty roll today - rather unexpectedly I must say! :p

I had some backgrounds I had made a few weeks ago whilst dabbling with a few Bernie Berlin techniques - these particular ones are "inky layers" but now I have added to them!

I stamped images from Tanda Stamps retro plate onto acetate and attached them to the backgrounds using a few spots of diamond glaze. I also stamped out some phrases onto mountboard to add to each ATC.

"So Stylish" - added 3 eyelets and wove some fibers through, and glued on a teeny weeny metal rose embellishment.

So Stylish

"You Got Style" - added a strip of fibers down one side and a string of pearls. Glued on some tiny pearls to make a necklace, and also added a teeny weeny metal rose embellishment in her hair.

You Got Style

"Lips, Cheeks, Eyes" - wound some lilac fibers round the left hand side a couple of times to add a bit of texture. Glued on another of those fab teeny weeny rose embellishments (into her hair again!) and made a necklace on her by gluing on teeny weeny flat-backed pearls. I think this one is my fave!

Lips, Cheeks, Eyes

With my Gothic Arches all complete and good to go, I decided to turn by my lickle beaded butterfly into a pin/brooch and enclose him as an RAK for the Guest Hostess Kathleen. Hope she likes it!

I feel it is time that butterflies flew away though, I have had them on the brain, which will slip into the drain if I do any more butterfly related crafting in the not too distant future!

Thursday, 7 August 2008

The Holiday is Over; 1 down 1 to go!

Hooray, hooray, it's a holi-holi-day! Done and dusted, 4 Holiday/Vacation Themed ATCs, 3 of which will go in for the ATC Addicts R Us themed swap for August. The other one... aha!

Anyways, to each ATC I chose an image from either the "funnies" or "travel" ATC paper pads, adding colour using direct to paper technique, to lift them up off the background. Also added 4 fancy corners to make each image look like a snapshot from a holiday photo album.

Got Tuna?

Attached the phrase "Got Tuna?" with mini micro brads, adding a fish charm (thank you FDF!) which I had alcohol inked. Final touch, a wavy peel off (yup, you read that right, a *peel off*!!!)...

Memories

Added an alcohol inked metal plaque - memories - and some rustic looking gold glass chips, to create the effect of a pebble beach...

Dip Your Toe In

Added a windsurfer charm which had been alcohol inked, attaching it with a brad. Another wavy line peel off (am I feeling alright?!) and this one was done!

The Gene Pool

My favourite I think - attached an alcohol inked sea conch charm using a mini micro brad, and added the phrase "The problem with the gene pool is that there is no lifeguard" - the final touch was a few of those rustic gold glass chips.

And, hip hip hooray, 1 down 1 to go - I have completed one of my gothic arches. I was drawn to them as soon as I woke up, so took advantage and got cracking with finishing one off.

So what have I added to what was once a mere background? 2 stamped images of teeny weeny flutterbies in spring pansy, coating the images with diamond glaze. I also stamped teeny weeny swirls in gold, attached a wire coil/ribbon to the bottom left hand corner, then, using wire, attached tiny lilac sequin flowers all the way round the arch so they kinda hang off - added a bit of ribbon to one of them. I bedazzled up the dark butterfly images on the backround paper using, those things I can never remember the name of... accent beads!!! I also gave both of these butterflies antennae (could resist!) Finally I added my alcohol inked metal butterfly and voila!

The Master Calls a Butterfly

Wednesday, 6 August 2008

We're All Going On a... Summer Holiday (Vacation!) - Uh oh... emergency glue supply required!

Last night I made a start on some backgrounds for a themed swap on ATC Addicts this month - Holidays/Vacations. I already had an idea to collage all the foreign postage stamps I had been saving up, so grabbed my glue stick and was off!

Holiday/Vacations Backgrounds (stage 1)

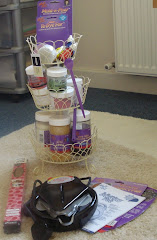
When I woke up this morning, I realised I couldn't really continue with these ATCs as I really, really needed a glue stick and mine had completely run out the night before. Doh! So I quickly went online to order a Tombow (best glue stick in the world... ever!) but needed something ASAP so in the interim, I popped to WHSmith and got a pink (yup, that's right, pink!) pritt stick. Turned out not to be the hottest glue in town, but hopefully my Tombow will arrive in a day or two, and besides, managed to grab the latest copy of Craft Stamper whilst Pritt Stick Shopping :)

A Pink Pritt Stick - Whatever Next?!

For those of you interested in the pritt stick, it goes on clear, dries clear etc. Anyhoo, moving on...

Over stamped postage stamp backgrounds using teal stazon and a mini postcard stamp (prima) and a gold inkpad and an ink pen stamp (argh, manufacturer of that stamp?! Elusive Images?) Then with my pinker than pink pritt stick I could glue on ripped blue mulberry paper, and then attached green netting (not sure where that came from - perhaps some fruit that was bought by Mumsy and has now been recycled into craft supplies!)

Holiday/Vacations Backgrounds (stage 2)

That was it from my crafting brain for today, I hope to get more out of it tomorrow!

Wednesday, 30 July 2008

Go Girl!!! Tummy Rub!!!

Wow, today I received a very special ATC - my Freaky Deaky Friendie's top notch niece wanted to make me summat for my new flat, and bearing in mind she is just 11, what an awesome ATC she has created for me! Not only that, but it is the first one she has ever made too :D

Go Girl In Your New Home

I feel privileged to be the recipient of her first artist trading card, and not only that, I know the time and thought that went into making (corners!!!) I had a sneaky feeling I was going to get a lickle summat, so I had made an ATC to give to my FDF's niece to say thanks muchly! Couldn't resist adding some beads and wire!

My FDF had made me the bestest new home card too! Getting quite a collection now :)

Ooh, crafty individuals backing paper and flutterbies :)

Oh... and the other day my pinky winky friendie shared with me the most gorgeous piccies of her doggy woggy, I just have to put one up on my blog to show the world how cute Matilda is! Her latest trick is "tummy rub" - all you have to do is call out those two words and she rolls on her back ready to have her tummy tickled! I want a doggy woggy!

Hands off my bag!!!

Tuesday, 29 July 2008

On the Scrapheap, Tea Time (and a card for a poorly girl)

Been crafting like crazy today - finished off Scrapheap Challenge ATCs for ATC Addicts R Us (just in the nick of time too!) Used my "border" Paper Artsy stamp for the first time, as well as some epoxy postage stamp stickers my FDF got me for Crimbo. Been waiting for ages for an ATC that they would work with, and finally got my chance - yay!

Exploring

How Much Longer

The Great Escape

Got my first new home ATC from a member of ATC Addicts R Us, Tea Time at Jo's... very clever idea, and a totally unexpected piece of mail :)

Anyone for a cuppa?

I had a card to finish off today as well, to send to Mumsy's work colleague's daughter who is very poorly in hospital at the moment. I hope she likes the card and that it will brighten her day, even if just for a few moments, when she opens it and reads our messages.

I used the bird stamp, as I hope over the coming weeks she will be able to fly away from the hospital and feel free again.

Sunday, 27 July 2008

Last Minute Waterfalls!

"Don't go chasing waterfalls, please stick to the rivers and the lakes that you're used to..."

Anyone remember that song? God, that takes me back... TLC, circa 199?

Anyways, I wanted so badly to do the waterfall ATCs for ATC Addicts, and having already cut out all the bits and pieces, it would have been nuts not to have done them, so, with the deadline tomorrow, I finished these ATCs in the nick of time, at 11pm!!!

Just to stress myself up even more, I thought I would have a bash at putting a slide show into this post, so you can see the full effect of a waterfall ATC. Why do I do these things to myself?!
Dreaming and Dancing...

What's New Pussycat...

My Flutterby Butterfly...

Girly Wirly

I did something very brave today... I used... wait for it...

s-t-i-c-k-e-r-s !!!

Anyone who knows me, will understand how traumatic this was for me - I am not a sticker person - but with the theme of "Girly Stuff" I didn't have an awful lot of scope in my ever expanding craft stash to use.

And, this is perhaps wierd, (but then I am a Freaky Deaky Crafty Chick after all!) but I find stickers really difficult to use on my work. Give me a few stamps and I am off, but stickers... my head retreats into its shed!

Anyhoo, I managed to locate some rather flash stickers that I think were part of a QVC TSV that me and Mumsy shared, and they tied in perfectly with a set of 3 charms that my Freakie Deaky Friendie had given me to help me get started on this themed swap. Phewie! It took me a while, but they finally came together...

You can never have too many bags, hats or shoes!

Flirty Dress!

Posh Frock

These ATCs are fairly simple: wide piece of pink ribbon, mulberry paper over one corner (you know me and my corners!), the words fun and sassy (DCWV paper methinks), a length of tape measure (all us girlies know about measuring up!) and for the focal point... stickers *shudder*

Had to jazz them up with gems, fibers, flowers, and the final touch, thanks to my FDF, the charms! Which I faffed with of course, and alcohol inked them, attaching a ribbon through the loops before using brads to hold them in place on the ATCs.

Phew, that was pretty stressful. Especially as the deadline is Monday, and they are for ATC Addicts which I co-own with my FDF, and I still have waterfall ATCs to do! What with moving, somehow time for crafting got shoved aside for a while, then wham bam, I've got deadlines looming! Thank goodness my creative muse was by my side today :D

Wednesday, 23 July 2008

Bernie Berlin... again!

Had to take on the challenge and take part in the Bernie Berlin ATC swap on UKATC. I was able to use 3 different background techniques from her book for this swap :)

I used one of the backgrounds I created on 14th July

http://freakydeakycrafter.blogspot.com/2008/07/bernie-berlin.html

I found a suitable image, and once I had that, the rest just came together! A layer of mesh, some mulberry paper, star eyelets and star gems. Made my own little chipboard letters to spell out "lovers".

"Lovers" (emboss-resist)

My second ATC uses a background created waaaaaay back... maybe early 2007? This uses the technique "fun foam". I had glued foam hearts onto an ATC base, layering some up double, then covered with foil tape and alcohol inked over the top. Yet again, finding an image that fitted in with my background gave me a good starting point and just by adding wire/bead embellishments and a word (again, I created my own chipboard letters) this ATC was done and dusted.

"Possession" (fun foam)

My last ATC used the technique "inky layers" though with a little improvisation on my part - I didn't have a coloured glazing medium as suggested, substituting it with diamond glaze... I don't think it made a huuuuuge difference..? This one was fun to make up, using a bottle cap image from Digital Collage Downloads, creating a framey with flowers to lift the image off the background. Added my trademark mesh, and yet more handmade chipboard letters... I think this one is my fave... or maybe "Lovers"... or maybe "Possession"... or maybe... I am just too darned indecisive!!!

"Innocence" (inky layers)

You see, the thing with the techniques in Bernie Berlin's book is, that you don't need to add much to complete an ATC, mainly because you don't want to cover up your lush backgrounds! Anyone fancying a challenge or a change, I highly recommend her book, available on Amazon and all the other usual places!

Artist Trading Card Workshop by Bernie Berlin.

Nail Varnish Backgrounds Fluttering By!

Finally turned those nail varnish backgrounds from 4th July...

http://freakydeakycrafter.blogspot.com/2008/07/nail-varnish-high-and-somewhere-to-be.html

... into completed ATCs!

I added gorge flutterby sequins which I had embellished myself with beads...

... and a swirly wirly die cut (courtesy of my craft penpal from the U S of A) ...

... then I stuck gems onto the die cuts to lift them off the backgrounds ...

... and used my new mini alphabet stamps from The Fruit Pixie to stamp either "soar" or "fly fly away" ...

I am liking flutterbies at the mo! Really excited as there is a butterfly themed Gothic Arch swap coming up on ATC Addicts in July/Aug... yay! :D

Monday, 14 July 2008

Bernie Berlin!

Tried a technique out of the Bernie Berlin book today (kindly given to me by my Freaky Deaky Friendie as a flat warming prezzie :) ) Not that I am in the flat yet... but I am getting there bit by bit!

The technique I tried is called "emboss resist" and I deviated from the instructions slightly (got carried away with adding colour!) but had fun cos I got to play with some of my new toys that arrived from Frantic Stamper - a set of Adirondack dabbers (blues!) and unmounted stamps too!

This pic shows the stage where I have painted ATC sized pieces of mountboard in various colours, stamped and embossed over the top using a clear ink pad and clear embossing powder, then dry brushed another acrylic paint over the top. They look slightly grungy...

And this pic shows the best of the final results after ironing over the ATCs to get that "resist" effect...

I was rather chuffed with what I made! Now... need to finish them off! I have rather a lot of unfinished symphonies at the moment (it's a habit of mine) but these I want to finish in particular, for the swap on UKATC, so watch this space!

Sunday, 13 July 2008

Dreaming of Midsummer

Our first Guest Hostess swap was held on ATC Addicts R Us, the theme was Shakespeare, and I couldn't resist joining in. I decided, after much deliberation, to go with an interpretation of A Midsummer Night's Dream...

Backgrounds use the handmade papers I created the other day with my fantasy fibers and my trusty iron! Then I took my fave fairy stamp (by Clarity Stamp) to be "Titania" (queen of the fairies) and inked it up with Stazon, placed a couple of pieces of fantasy film over the top, a piece of paper to protect it, and ironed carefully...

Titania, Queen of the Fairies

Attached the images using wire and a couple of brads, then embellished my ATCs with the word "dream" and sparkly gems and sequins. Fun to make!

Wednesday, 9 July 2008

Ironing is Fun!

Backtracking 8th July 2008

It's amazing what you can do with an iron - they aren't just for laundry don't you know! I hadn't used my fantasy fibers/films since I took part in a workshop (like, 2 years ago!) and when I was watching QVC the other day there was Leonie demonstrating them, which gave me an itch I had to scratch and so I got out my fantasy fibers and fantasy films to have a play!

Knowing I had some ATCs to get done, I started with my fantasy fibers and created some backing papers using the fantasy fibers, a few different colours, and sandwiched some sequins in between the layers.

I used star and fairy wand sequins, as I want to use these backgrounds for a themed swap of "Shakespeare" being run by our guest hostess at ATC Addicts R Us (my take on it being fairies/Midsummer Nights Dream)

I had some scraps left over so of course could not resist playing around to see what happens when you iron all your scraps!

This is fantasty film, fantasy fibers, round sequins, and a sprinkling of teeny tiny prima flowers sandwiched in-between.

This is fantasy film with a tiny sprinkling of fantasy fibers, a few prima flowers and a piece of a pink heather embellishment that has been hanging around a while, waiting to be put to good use.

Well, who wants to iron bed sheets and trousers and tops when you can iron for craft purposes!!!

Inspired by Primark?!

Backtracking - 30th June 2008

I had a mega hectic day yesterday (I made it to London to see my mate, thanks to Freaky Deaky Dad's support) and was introduced to the world of Primark. Totally bargainous store, but mega busy and really too much, so we soon retreated to Starbucks!

Today, I made use of the labels that came of the pair of cargo trousers I bought (was well surprised they had trousers long enough for my legs in such a cheap shop!) and I made a card :)

Been ages since I actually made a card, as for months all I have really done is ATCs and altered art bits and bobs. It wasn't too painful though to make my brain think on a bigger scale.

The bits from the clothing tags are the ripped rough brown paper, and the length of twill that I have attached with an eyelet over the top. I stitched down the left and right side of it using wire. Used backing papers that have been kicking around for a while, ripped it, and embossed the torn edge with one of my de-lovely B-Muse embossing powders. Got inky and used direct to paper in various colours over the rest of the card to co-ordinate, then finally used a wooden heart and wrapped wire round, adding some coils top and bottom, and 3 stitched crosses onto the right hand corner of the card, as finishing touches. It was fun!

Note to self: make cards more often!

But... I couldn't resist making an ATC too!!!

Swap Time, a Stonking Pin and Vaseline!!!

Backtracking - 28th June 2008

It's that time of the month once again, when swapping commences for ATC Addicts R Us. Each month, I try not to have a nervous breakdown when doing the swaps, but I guess it is an occupational hazard! This time though, I had help from the co-owner aka my Freaky Deaky Friendie, which was muchly appreciated! It was soooooooooo much quicker having someone to help me out! And she gave me an RAK ATC which I love! I have had my eye on that stamp for quite some time and am jealous that she owns it!

A last minute envelope of ATCs arrived from bonnie Scotland, and inside, a most stunning pin she had made for me, as an RAK - check it out! She used polymer clay and perfect pearls...

My Freaky Deaky Friendie stayed the whole day, so we had time for crafting once the swaps were done and dusted! My friendie made a start on creating her treasure box (a swap on Advanced Artist Trading Cards) and what she made was stonking!

It inspired me, and I started playing around with colours and themes... it really helps to have a crafty friend when you need inspiration (and honest, trustworthy critique too!) On making our way to the craft room, we walked past the vaseline I had been putting on my sore nose (see crafting with a cold!) and I thought - aha! Resist!

Splodged and smeared some on a couple of ATC blanks, and waited... it refused to dry... waited some more... got impatient and blasted them with my heat gun - whoo! Dried it! (Was slightly concerned it might just make it all smooshy again) Then I brayered over with a rainbow dye ink pad, and voila:


The jury is out on whether these are much cop, guess it depends what I add to these backgrounds... ooooh... I wonder if I could rubber stamp with vaseline...?! Watch this space...

UTEE or not UTEE?!

Backtracking - 27th June 2008

I spent the day playing with UTEE, using playing cards as my base (ones sent to me as an RAK by a member of ATC Addicts R Us) - a couple of layers of UTEE, then quickly sprinkled over some of my new B-Muse embossing powders in....
  • aged copper
  • metallic marmalade
  • raspberry dazzle
  • creamy mauve metallic

(don't they have fab names?!)

I stamped into the molten UTEE using some new corner stamps I have been dying to try out (a gift from Crafty Chick to Crafty Chick from That's Crafty Online when I was stocking up on adhesives!)

Then I took some teeny ballerina images and stuck them into a couple of frame charms I have been saving for a special occasion - I used UTEE to glaze over, and sprinkled in some accent beads (this whole process will be so much easier when I get my melt pot - roll on 16th August!)

Used wire and beads to create a dangly to attach the ballerina pendant charms I had made, and added a bead drop just because you can never have too many beads on a project! Then I glitzed up even more by adding teeny weeny gems in various parts of the impressions that had been made by stamping into the UTEE.

This one I gave to my Freaky Deaky Friendie...

...and this one is for *me*

More With UTEE...

I couldn't accept the playing cards RAK without sending something in return that I had created on the card/s to say thank you, so more UTEE was flying around the room and I played around again, this time, trying to let the diamonds on the playing cards show through, so I went easy on the coloured embossing powders when I sprinkled them over my layers of UTEE - two of the embossing powders are scented...

  • baby powder (light pink)
  • strawberry (red)

...I wonder if they still smell after travelling to their recepient? Let me know if you are reading this guys! They certainly left a nice niff in the craft room :)

This time I inked up my stamps with stazon so as to make very bold impressions - ballerina stamp and distressed harlequin stamp - so me it looked like the ballerina was dancing on diamonds so that was what I titled these ATCs...

A finishing touch was required (I mean, how can I make an ATC with no embellishments?!) so i sought out 2 sizes of square brads, used embossing powders to make them fit in with the colours I had already created, and attached them so they looked like diamonds. Voila! I loved the colours on the second ATC so much that I submitted it to ATC Addicts R Us for the "My Favourite Colour" Swap, and got this lovely one in return:

I will credit the artist, if they are OK with that :)