
And Now For Something A Little Bit Different...

To Those That Dream There is no Such Place as Faraway
Ahhhhhh! There was no stopping me then. I grabbed the 4 jumbo playing cards (an extra swap currently running on UKATC) sent to me by Paula, and started creating backgrounds and generally getting all painty!
Backgrounds for Jumbo ATC Swap
On the other 2 backgrounds (on the right hand side of the piccie above) I used watered down acrylic paints brushed on over a layer of gesso (just to prime) and then I scrunched up clingfilm and placed it over the top. When I lifted off the clingfilm, I wanted a bit more of a sheen, so a added a few drops of luna lights and repeated scrunched clingfilm part. Looks kinda marbled, pretty cool! It's amazing what you can do with Morisson's mucho cheap clingfilm!

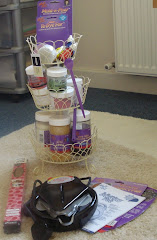
Emotibombs: Up The Wooden Hill, Sex in the Shower (steady on!!!)
Shower Gel: Flying Fox
I am now not quite so miffed by the fact that I do not have a bath. And we copped some free samples of soaps, Rock Star and Extra Virgin Olive. Lusherly! Thank you Scrappy Wappy Friendie for the gifties and card.
Cupcake Hoodie

Close Up of Cupcake!

Touchy Feely Hoodie

Lovely Buttons!
This hoodie had a spare button... a diamante heart... now I am faced with the dilemma - do I...
a) keep the button in my jewellery box in case I happen to lose one?
or
b) put the button straight in my craft stash?
Answers on a postcard!
My Scrappy Wappy Friendie asked me to show her how to make an embellishment using wire/beads, so I helped her to do a beaded heart, our efforts are shown below...

She can use it on a scrapbook page... once I send it to her! Cos she left it behind - doh!

Card and Pussy Cat Framey Wamey from Bandy Wandy Friendie

Fly Away Home

2 Little Angels
The next coaster was a bit tricky-wicky, as it was the first time I had used my crop-a-dile to attach organza ribbon onto a surface with eyelets. I didn't want to spoil ye olde coaster, and fortunately, after a bit of faffing, I got the effect I was after. Added some velvet ribbon too, for a bit of touchy feely-ness. The no.2 and edge of the coaster have B-Muse embossing powders on them, and the no. is attached with 4 teeny tiny "screw head" brads. I alcohol inked a round frame from The Fruit Pixie, and attached it over my chosen image with brads. A touch of bling was needed to finish off, so I applied gems, beads and wire to complete the coaster.

2 Hearts Beating as 1
This is my secone fave coaster out of the four I made. Image is crafty Individuals, a little ric rac down one side (thank you FDF for your advice!) and interlocked the image into a die cut swirl that I had embossed with, yup, you got it, B-Muse embossing powders (and the edge of the coaster too!) Alcohol inked a washer and a button, using the washer to frame my no. and the button as an embellishment. Completed my chosen phrase "2gether" (not good English I know - but I think it looks good on arty farty stuff) The finishing touch was a flower from a sheet of prima flowers sent to me as an RAK by a member of the group ATC Addicts R Us (thank you!)

2-gether
My most favourite coaster of all... really hard to part with this one, yet I didn't like it at first! How odd... Anyway, attached some vintage lace using some large eyelets, tucking my image (Crafty Individuals) underneath on one side. Added my phrase "IT TAKES" and my no. 2, and used gold trim under both the no. and the image. Used some pink gems to create a corner on the top right, attach these with wire (unusual gems these, they have 2 holes on the top). Finishing touch, attaching some musical note charms with wire, twisted this way and that.

It Takes 2 (to Tango)
If no one wants this one in the swap... I wonder if I could have my own back?!

I feel privileged to be the recipient of her first artist trading card, and not only that, I know the time and thought that went into making (corners!!!) I had a sneaky feeling I was going to get a lickle summat, so I had made an ATC to give to my FDF's niece to say thanks muchly! Couldn't resist adding some beads and wire!


Ooh, crafty individuals backing paper and flutterbies :)
Oh... and the other day my pinky winky friendie shared with me the most gorgeous piccies of her doggy woggy, I just have to put one up on my blog to show the world how cute Matilda is! Her latest trick is "tummy rub" - all you have to do is call out those two words and she rolls on her back ready to have her tummy tickled! I want a doggy woggy!

Hands off my bag!!!

"Lovers" (emboss-resist)
My second ATC uses a background created waaaaaay back... maybe early 2007? This uses the technique "fun foam". I had glued foam hearts onto an ATC base, layering some up double, then covered with foil tape and alcohol inked over the top. Yet again, finding an image that fitted in with my background gave me a good starting point and just by adding wire/bead embellishments and a word (again, I created my own chipboard letters) this ATC was done and dusted.
"Possession" (fun foam)
My last ATC used the technique "inky layers" though with a little improvisation on my part - I didn't have a coloured glazing medium as suggested, substituting it with diamond glaze... I don't think it made a huuuuuge difference..? This one was fun to make up, using a bottle cap image from Digital Collage Downloads, creating a framey with flowers to lift the image off the background. Added my trademark mesh, and yet more handmade chipboard letters... I think this one is my fave... or maybe "Lovers"... or maybe "Possession"... or maybe... I am just too darned indecisive!!!

"Innocence" (inky layers)
You see, the thing with the techniques in Bernie Berlin's book is, that you don't need to add much to complete an ATC, mainly because you don't want to cover up your lush backgrounds! Anyone fancying a challenge or a change, I highly recommend her book, available on Amazon and all the other usual places!
Artist Trading Card Workshop by Bernie Berlin.


... and used my new mini alphabet stamps from The Fruit Pixie to stamp either "soar" or "fly fly away" ...

I am liking flutterbies at the mo! Really excited as there is a butterfly themed Gothic Arch swap coming up on ATC Addicts in July/Aug... yay! :D

Here we go again - another all night crafting session! This time gingham, a themed swap on UKATC for June. After recovering from the fact that Mumsy had *thrown out some scraps of material including gingham*, and a trip to John Lewis to buy some more, I was finally able to get going on these ones. Yeah!

My backgrounds were created from my scraps box - I call it Scrapheap Challenge, but I doubt I am the first person to make a background from scraps! Maybe mine are slightly different in the fact that I randomly stamped a scissor image over the top, added a layer of tulle netting, and went sew-crazy with my mini sewing machine to create random stitching over the top.

I stamped and cut out an 4 images of a dressmaker's stand, 1 for each ATC, and proceeded to dress each in a different style skirt (created more by luck than judgement (!!!) by folding and pleating circles of gingham). Used ribbon to create a kind of gingham top (very low cut!) and finished the actual outfit with a pearl buckle threaded through gingham ribbon, and some teeny weeny flower sequins.

I used Merlin (my dear old Wizard) to die-cut flowers from gingham, adding one as a finish touch, along with a teeny weeny pearl for the centres, and a smattering of beads in one corner. And as is my current trend, chose one ATC to keep for me, and here it is:


 Posts
All Comments




| My Birthdate: August 16 |
 You're incredibly introverted and introspective. You live inside your head. You spend a lot of alone time meditating and thinking. People see you as withdrawn, and at times they are right. You are caring and deep, but it may be difficult for you to show this side of yourself. Your strength: Your original approach to thinking Your weakness: You tend to shy away from others Your power color: Pale blue Your power symbol: Wavy line Your power month: July |
| My Brain's Pattern |
 Your mind is a multi dimensional wonderland, with many layers. You're the type that always has multiple streams of though going. And you can keep these thoughts going at any time. You're very likely to be engaged in deep thought - and deep conversation. |
| You Are 1: The Reformer |
 You're a responsible person - with a clear sense of right and wrong. High standards are important to you, and you do everything to meet them. You are your own worst critic, feeling ashamed if you're not perfect. You have uncompromising integrity, and people expect you to be fair. At Your Best: You are hopeful, honest, and inspiring. You bring out the best in humanity. At Your Worst: You are intolerant, judgmental, and picky. Your Fixation: Resentment Your Primary Fear: Being corrupt. Your Primary Desire: To be good. Other Number 1's: Al Gore, Martha Stewart, Gandhi, Celene Dion, and Spock from Star Trek. |
| What My Name Means |
 You are well rounded, with a complete perspective on life. You are solid and dependable. You are loyal, and people can count on you. At times, you can be a bit too serious. You tend to put too much pressure on yourself. You are usually the best at everything ... you strive for perfection. You have the classic "Type A" personality. You are very intuitive and wise. You understand the world better than most people. You also have a very active imagination. You often get carried away with your thoughts. You are prone to a little paranoia. You sometimes go overboard in interpreting signals. You are friendly, charming, and warm. You get along with almost everyone. You work hard not to rock the boat. Your easy going attitude brings people together. At times, you can be a little flaky and irresponsible. But for the important things, you pull it together. You are a naturally creative person. Ideas just flow from your mind. A true chameleon, you are many things at different points in your life. You are very adaptable. You tend to be pretty tightly wound. It's easy to get you excited... which can be a good or bad thing. You have a lot of enthusiasm, but it fades rather quickly. You don't stick with any one thing for very long. You have the drive to accomplish a lot in a short amount of time. Your biggest problem is making sure you finish the projects you start. You are wild, crazy, and a huge rebel. You're always up to something. You have a ton of energy, and most people can't handle you. You're very intense. You definitely are a handful, and you're likely to get in trouble. But your kind of trouble is a lot of fun. You are influential and persuasive. You tend to have a lot of power over people. Generally, you use your powers for good. You excel at solving other people's problems. |


