Showing posts with label bernie berlin. Show all posts

Tuesday, 12 August 2008

More Than Inky Layers and Flutterbies to Go

Seemed to be on a bit of a crafty roll today - rather unexpectedly I must say! :p

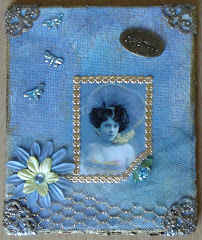
I had some backgrounds I had made a few weeks ago whilst dabbling with a few Bernie Berlin techniques - these particular ones are "inky layers" but now I have added to them!

I stamped images from Tanda Stamps retro plate onto acetate and attached them to the backgrounds using a few spots of diamond glaze. I also stamped out some phrases onto mountboard to add to each ATC.

"So Stylish" - added 3 eyelets and wove some fibers through, and glued on a teeny weeny metal rose embellishment.

So Stylish

"You Got Style" - added a strip of fibers down one side and a string of pearls. Glued on some tiny pearls to make a necklace, and also added a teeny weeny metal rose embellishment in her hair.

You Got Style

"Lips, Cheeks, Eyes" - wound some lilac fibers round the left hand side a couple of times to add a bit of texture. Glued on another of those fab teeny weeny rose embellishments (into her hair again!) and made a necklace on her by gluing on teeny weeny flat-backed pearls. I think this one is my fave!

Lips, Cheeks, Eyes

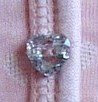
With my Gothic Arches all complete and good to go, I decided to turn by my lickle beaded butterfly into a pin/brooch and enclose him as an RAK for the Guest Hostess Kathleen. Hope she likes it!

I feel it is time that butterflies flew away though, I have had them on the brain, which will slip into the drain if I do any more butterfly related crafting in the not too distant future!

Thursday, 7 August 2008

On a roll!

My second and final gothic arch is completed for the swap on ATC Addicts R Us.

So what did I add to this Crafty Individuals based background that I created last week with Mumsy? Well, I stamped some teeny weeny swirls in gold, attached a wire coil/ribbon to the bottom left hand corner, then, using wire, attached beads all the way around the arch (quite time consuming but defo worth it).

I used diamond glaze to accent the white butterflies on the background paper, then added 2 glittery flutterby stickers (will never forget how these came to be in my possession - they were a bonus item with one of my first orders from 3D Jean way back when). I gave both of these butterflies antennae (could resist!) Finally I added my alcohol inked metal butterfly, then, some wire coils and a sequin butterfly to take the design off the arch... I think this is my fave of the 2 Gothic Arches I have made. But I keep changing my mind (a girls' perogative!)

To Those That Dream There is no Such Place as Faraway

Ahhhhhh! There was no stopping me then. I grabbed the 4 jumbo playing cards (an extra swap currently running on UKATC) sent to me by Paula, and started creating backgrounds and generally getting all painty!

I used one of Bernie Berlin's techniques on the 2 on the left hand side, "resin fresco" - used Adirondack dabbers over randomly sprinkled and heated UTEE and a couple of brush strokes of gesso. Interesting effect, think it has to be seen in the flesh, or at least very close up, to see the real texture created using that technique.

Backgrounds for Jumbo ATC Swap

On the other 2 backgrounds (on the right hand side of the piccie above) I used watered down acrylic paints brushed on over a layer of gesso (just to prime) and then I scrunched up clingfilm and placed it over the top. When I lifted off the clingfilm, I wanted a bit more of a sheen, so a added a few drops of luna lights and repeated scrunched clingfilm part. Looks kinda marbled, pretty cool! It's amazing what you can do with Morisson's mucho cheap clingfilm!

Rather liked doing that kind of background, so whilst I was all messy, thought I would do a couple on regular sized ATCs too, for future creations!

Acrylic Paint, Luna Lights and Clingfilm

When all is said and done, a very productive day indeedy!

Friday, 1 August 2008

Coasting!!!

Finally my finished Altered Coaster for a swap on Advanced Artist Trading Cards have been completed and sent off in the post! Backgrounds were all done using Bernie Berlin's background technique "emboss resist", then, the theme being numbers, I had to pick my fave no... 2! (no rude jokes please!)

The harlequin background on this coaster gave me a great starting point, and it was easy to choose an image for it - this one is stamped onto acetate, and I had layered 3 strips of mulberry paper underneath, to add a bit of depth to the image. I cracked open a packed of "diamond" Ranger pop outs that I have been hoarding for some time, and used B-Muse embossing powders on them, and then swiped round the edge of the coaster with versamark and used the same colour embossing powder as I had done on the pop outs. Beaded chain around my no.2 and around the diamonds, plus a few diamante stars, and this one was completed!

2 Little Angels

The next coaster was a bit tricky-wicky, as it was the first time I had used my crop-a-dile to attach organza ribbon onto a surface with eyelets. I didn't want to spoil ye olde coaster, and fortunately, after a bit of faffing, I got the effect I was after. Added some velvet ribbon too, for a bit of touchy feely-ness. The no.2 and edge of the coaster have B-Muse embossing powders on them, and the no. is attached with 4 teeny tiny "screw head" brads. I alcohol inked a round frame from The Fruit Pixie, and attached it over my chosen image with brads. A touch of bling was needed to finish off, so I applied gems, beads and wire to complete the coaster.

2 Hearts Beating as 1

This is my secone fave coaster out of the four I made. Image is crafty Individuals, a little ric rac down one side (thank you FDF for your advice!) and interlocked the image into a die cut swirl that I had embossed with, yup, you got it, B-Muse embossing powders (and the edge of the coaster too!) Alcohol inked a washer and a button, using the washer to frame my no. and the button as an embellishment. Completed my chosen phrase "2gether" (not good English I know - but I think it looks good on arty farty stuff) The finishing touch was a flower from a sheet of prima flowers sent to me as an RAK by a member of the group ATC Addicts R Us (thank you!)

2-gether

My most favourite coaster of all... really hard to part with this one, yet I didn't like it at first! How odd... Anyway, attached some vintage lace using some large eyelets, tucking my image (Crafty Individuals) underneath on one side. Added my phrase "IT TAKES" and my no. 2, and used gold trim under both the no. and the image. Used some pink gems to create a corner on the top right, attach these with wire (unusual gems these, they have 2 holes on the top). Finishing touch, attaching some musical note charms with wire, twisted this way and that.

It Takes 2 (to Tango)

If no one wants this one in the swap... I wonder if I could have my own back?!

Wednesday, 23 July 2008

Bernie Berlin... again!

Had to take on the challenge and take part in the Bernie Berlin ATC swap on UKATC. I was able to use 3 different background techniques from her book for this swap :)

I used one of the backgrounds I created on 14th July

http://freakydeakycrafter.blogspot.com/2008/07/bernie-berlin.html

I found a suitable image, and once I had that, the rest just came together! A layer of mesh, some mulberry paper, star eyelets and star gems. Made my own little chipboard letters to spell out "lovers".

"Lovers" (emboss-resist)

My second ATC uses a background created waaaaaay back... maybe early 2007? This uses the technique "fun foam". I had glued foam hearts onto an ATC base, layering some up double, then covered with foil tape and alcohol inked over the top. Yet again, finding an image that fitted in with my background gave me a good starting point and just by adding wire/bead embellishments and a word (again, I created my own chipboard letters) this ATC was done and dusted.

"Possession" (fun foam)

My last ATC used the technique "inky layers" though with a little improvisation on my part - I didn't have a coloured glazing medium as suggested, substituting it with diamond glaze... I don't think it made a huuuuuge difference..? This one was fun to make up, using a bottle cap image from Digital Collage Downloads, creating a framey with flowers to lift the image off the background. Added my trademark mesh, and yet more handmade chipboard letters... I think this one is my fave... or maybe "Lovers"... or maybe "Possession"... or maybe... I am just too darned indecisive!!!

"Innocence" (inky layers)

You see, the thing with the techniques in Bernie Berlin's book is, that you don't need to add much to complete an ATC, mainly because you don't want to cover up your lush backgrounds! Anyone fancying a challenge or a change, I highly recommend her book, available on Amazon and all the other usual places!

Artist Trading Card Workshop by Bernie Berlin.

Sunday, 20 July 2008

I'm here!

Yesterday I moved into my new place - gulp! At the risk of sounding like I am giving an "Oscar winning thank you performance" I must say ta very muchly to Mumsy and Freaky Deaky Dad, who helped me move most of my stuff, not to mention helping me to spring clean from top to bottom and shift furniture around - rewarded them with a Chinese takeaway!

Now, here's a question for you...

Q: What is the most important part of Freaky Deaky Crafty Chick's home?
A: Craft Space!!!

Here is the "before picture" - taken first thing this morning... oh the jumble!

Then along came my fairy godmother in the shape of my Freaky Deaky Crafty Friendie, and with her magic wand and my fairy dust (plus rather a lot of shuffling things around and re-jigging me bits and bobs) we turned an area of my lounge into this...

Ta da!!!

And do you know what? My FDCF bought me a giftie, well she bought it over here, but she actually created it herself - wow! I was sooooooo chuffered; not only had she taken the time to make me an stonking altered canvas, but she even wrote the words herself - I think I shall start calling her my Uber Talented Freaky Deaky Crafty Friendie!

"A time to craft, a time to play, A time to art your heart away,

A time to get messy, and time to have fun, a time to art until you are done,

New techniques, new tools to use, experiment with them, use your creative muse..."

After receiving such a wonderful gift, and a craft space ready to rumble, how could I resist having a play?! So I made a start on an altered coaster swap for Advanced Artist Trading. Using a technique from Bernie Berlin's book, I created resist backgrounds using acrylic paints, paint dabbers, clear heat embossing with rubber stamps, more paint (dry brushed on) and then applied a hot iron...

For some reason, I didn't get quite the right effect on the top R coaster, and the bottom R one was naughty and some of the actual chipboard of the coaster came off after ironing (iron too hot?). That said, the ones on the left hand side I am well chuffed with :)

Theme for the swap is numbers, so to include my favourite or a significant no. on each coaster. So what's the magic no.? That'd be telling!

Monday, 14 July 2008

Bernie Berlin!

Tried a technique out of the Bernie Berlin book today (kindly given to me by my Freaky Deaky Friendie as a flat warming prezzie :) ) Not that I am in the flat yet... but I am getting there bit by bit!

The technique I tried is called "emboss resist" and I deviated from the instructions slightly (got carried away with adding colour!) but had fun cos I got to play with some of my new toys that arrived from Frantic Stamper - a set of Adirondack dabbers (blues!) and unmounted stamps too!

This pic shows the stage where I have painted ATC sized pieces of mountboard in various colours, stamped and embossed over the top using a clear ink pad and clear embossing powder, then dry brushed another acrylic paint over the top. They look slightly grungy...

And this pic shows the best of the final results after ironing over the ATCs to get that "resist" effect...

I was rather chuffed with what I made! Now... need to finish them off! I have rather a lot of unfinished symphonies at the moment (it's a habit of mine) but these I want to finish in particular, for the swap on UKATC, so watch this space!