Showing posts with label rubber stamping. Show all posts

Tuesday, 8 March 2011

Crafty Chick Is Back!!!

After a looooooong time off (had a baby, moved house etc. etc.) my FDF suggested we go to a card making class at http://www.sirstampalot.co.uk/ so off we went! Here are the 3 cards we made during the 2 hour class:


Woodware Clear Magic Stamps - Birdsong
Woodware Clear Magic Stamps - Elegant Cameos


We used gilding flakes on the back of stamped images to create the main elements of each card. Then we did simple matting and layering along with punched out flowers, brads and ribbon to finish of these scalloped cards. What a great couple of hours!!!

Sunday, 17 August 2008

Melt Pot In Da House (and the big 30)

Could you get a bigger 30 on a birthday card?!

Thank you sis for reminding me just how old I am now! (That said, I am still 29 if anyone asks me. Besides, I have been asked for ID *twice* in 3 weeks to buy cigarettes!!!)

It was one of the strangest birthdays I have ever had, being in new surroundings, not waking up to the aged parents singing "Happy Birthday To You" (they text me it instead lol!)

I felt "reet spoilt" with all my prezzies and cards! Mumsy bought me some flowers too!

The Window Sill of Birthday Cards (and flowers!)

Got some stonkingly stunning gifties! Some crafty people have craftily looked at my wish list here on my blog and fulfilled two of my wishes! I got the Tim Holtz DVD (his first one) *and* some Chapel Road Art Stamps...


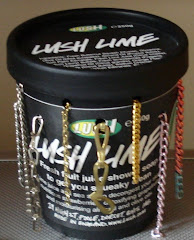
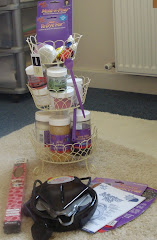
Craft wise, I also got my much hankered after Melt Pot, UTEE, To Dye For Inks and other accessories to go with it. But most stonkingly of all, I got a cake stand! (OK, you may be thinking what on earth does she want with a cake stand and how does that fit in with being crafty - let me explain...)

A Baa-Me Chick bought one to use as decorative storage for her crafty bits and bobs, and my Freaky Deaky Friendie followed the trend. I have fancied one myself for ages, but no room for it in my previous craft space. Who bought it for me? Mumsy of course! I am using it to store all my Melt Pot stuff, and I think cake stands rock! (as long as they don't have cake in them lol!) Other crafty bits I got included an additional bead storage box that I had been dying for :)

My Prezzies (and Birthday ATCs in the background!)
Other prezzies I got included money (some of which will go on crafty stuff no doubt!), Diddl writing pad, Diddl letterset, Lush Gift set "Happy", Lush Happy Hippy shower gel, Heavenly Bodies buttercream, Care Bear top, a superbly special mouse mat, grow your own Birthday Gerbara, Mamma Mia soundtrack, lovely smellie candles and a lusherly turquoise/brown/pewter coin purse...
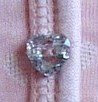
Mumsy pulled out all the stops with her handmade card! Laura Ashley papers/epoxy stickers and pretty prima flowers and a peridot (my birthstone) brad.

Super Duper Card from Mumsy (and Freaky Deaky Dad)

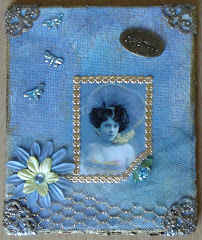
I also got some fab RAKs off crafty peeps, both cards and ATCs, check 'em out! You can't really see them properly in the piccie of my gifties, so here they are in full view! These are all made by members of the various Yahoo groups I belong to...

Saturday, 9 August 2008

New Treats!

Wow, went halves with my FDF on some "Wafugami" speciality papers at a bargainous price! $19.99 (that's around a tenner!) and we got 16 packs of different colour combo/designs of these gorgeous delicate papers. Each pack contained at least 12 sheets... just look at my half of the stash... all laid out... they are all double sided, and some have the most gorgeous metallic or pearlescent sheen to them... mwah!

"Beautiful exotic paper in handy 6"x6" size pieces. Great for collage, rubber stamping, scrapbooking, iris folding, cardmaking, altered arts and more! "

To top it all off, the packs each had the most fantasticly sumptuous names!

  • Lime Gingham Combo
  • Light Pink Gingham Combo
  • Red Gingham Combo
  • Light Blue Gingham combo
  • Bubblegum
  • Gold Metallic/Solid Combo
  • Metallic Shades of Greens
  • Metallic Shades of Red/Pink
  • Horizon Wave Art Combo
  • Summer Daze

Yummy! These papers are, for want of a better word, lusherly! But will they get used, or become part of my "look don't touch" craft stash museum? Will have to wait and see!

Thursday, 7 August 2008

On a roll!

My second and final gothic arch is completed for the swap on ATC Addicts R Us.

So what did I add to this Crafty Individuals based background that I created last week with Mumsy? Well, I stamped some teeny weeny swirls in gold, attached a wire coil/ribbon to the bottom left hand corner, then, using wire, attached beads all the way around the arch (quite time consuming but defo worth it).

I used diamond glaze to accent the white butterflies on the background paper, then added 2 glittery flutterby stickers (will never forget how these came to be in my possession - they were a bonus item with one of my first orders from 3D Jean way back when). I gave both of these butterflies antennae (could resist!) Finally I added my alcohol inked metal butterfly, then, some wire coils and a sequin butterfly to take the design off the arch... I think this is my fave of the 2 Gothic Arches I have made. But I keep changing my mind (a girls' perogative!)

To Those That Dream There is no Such Place as Faraway

Ahhhhhh! There was no stopping me then. I grabbed the 4 jumbo playing cards (an extra swap currently running on UKATC) sent to me by Paula, and started creating backgrounds and generally getting all painty!

I used one of Bernie Berlin's techniques on the 2 on the left hand side, "resin fresco" - used Adirondack dabbers over randomly sprinkled and heated UTEE and a couple of brush strokes of gesso. Interesting effect, think it has to be seen in the flesh, or at least very close up, to see the real texture created using that technique.

Backgrounds for Jumbo ATC Swap

On the other 2 backgrounds (on the right hand side of the piccie above) I used watered down acrylic paints brushed on over a layer of gesso (just to prime) and then I scrunched up clingfilm and placed it over the top. When I lifted off the clingfilm, I wanted a bit more of a sheen, so a added a few drops of luna lights and repeated scrunched clingfilm part. Looks kinda marbled, pretty cool! It's amazing what you can do with Morisson's mucho cheap clingfilm!

Rather liked doing that kind of background, so whilst I was all messy, thought I would do a couple on regular sized ATCs too, for future creations!

Acrylic Paint, Luna Lights and Clingfilm

When all is said and done, a very productive day indeedy!

The Holiday is Over; 1 down 1 to go!

Hooray, hooray, it's a holi-holi-day! Done and dusted, 4 Holiday/Vacation Themed ATCs, 3 of which will go in for the ATC Addicts R Us themed swap for August. The other one... aha!

Anyways, to each ATC I chose an image from either the "funnies" or "travel" ATC paper pads, adding colour using direct to paper technique, to lift them up off the background. Also added 4 fancy corners to make each image look like a snapshot from a holiday photo album.

Got Tuna?

Attached the phrase "Got Tuna?" with mini micro brads, adding a fish charm (thank you FDF!) which I had alcohol inked. Final touch, a wavy peel off (yup, you read that right, a *peel off*!!!)...

Memories

Added an alcohol inked metal plaque - memories - and some rustic looking gold glass chips, to create the effect of a pebble beach...

Dip Your Toe In

Added a windsurfer charm which had been alcohol inked, attaching it with a brad. Another wavy line peel off (am I feeling alright?!) and this one was done!

The Gene Pool

My favourite I think - attached an alcohol inked sea conch charm using a mini micro brad, and added the phrase "The problem with the gene pool is that there is no lifeguard" - the final touch was a few of those rustic gold glass chips.

And, hip hip hooray, 1 down 1 to go - I have completed one of my gothic arches. I was drawn to them as soon as I woke up, so took advantage and got cracking with finishing one off.

So what have I added to what was once a mere background? 2 stamped images of teeny weeny flutterbies in spring pansy, coating the images with diamond glaze. I also stamped teeny weeny swirls in gold, attached a wire coil/ribbon to the bottom left hand corner, then, using wire, attached tiny lilac sequin flowers all the way round the arch so they kinda hang off - added a bit of ribbon to one of them. I bedazzled up the dark butterfly images on the backround paper using, those things I can never remember the name of... accent beads!!! I also gave both of these butterflies antennae (could resist!) Finally I added my alcohol inked metal butterfly and voila!

The Master Calls a Butterfly

Wednesday, 6 August 2008

We're All Going On a... Summer Holiday (Vacation!) - Uh oh... emergency glue supply required!

Last night I made a start on some backgrounds for a themed swap on ATC Addicts this month - Holidays/Vacations. I already had an idea to collage all the foreign postage stamps I had been saving up, so grabbed my glue stick and was off!

Holiday/Vacations Backgrounds (stage 1)

When I woke up this morning, I realised I couldn't really continue with these ATCs as I really, really needed a glue stick and mine had completely run out the night before. Doh! So I quickly went online to order a Tombow (best glue stick in the world... ever!) but needed something ASAP so in the interim, I popped to WHSmith and got a pink (yup, that's right, pink!) pritt stick. Turned out not to be the hottest glue in town, but hopefully my Tombow will arrive in a day or two, and besides, managed to grab the latest copy of Craft Stamper whilst Pritt Stick Shopping :)

A Pink Pritt Stick - Whatever Next?!

For those of you interested in the pritt stick, it goes on clear, dries clear etc. Anyhoo, moving on...

Over stamped postage stamp backgrounds using teal stazon and a mini postcard stamp (prima) and a gold inkpad and an ink pen stamp (argh, manufacturer of that stamp?! Elusive Images?) Then with my pinker than pink pritt stick I could glue on ripped blue mulberry paper, and then attached green netting (not sure where that came from - perhaps some fruit that was bought by Mumsy and has now been recycled into craft supplies!)

Holiday/Vacations Backgrounds (stage 2)

That was it from my crafting brain for today, I hope to get more out of it tomorrow!

Thursday, 24 July 2008

New Address Cards and My Bunny Wabbit

I felt uber creative this evening (and I couldn't sleep) so I made a set of new address cards to send to various relatives. Kept them simple - stamped backgrounds (on the left hand side ones I have used Prima stamps, on the right hand side ones Crafty Individuals) Matted and layered onto 2 further pieces of card picking out colours from the skeleton leaves used on the front. I have had those kicking around for a good couple of years, not really knowing what to do with them, so took this opportunity to break open the packet and use them! Stamped "new address" onto vellum and attached over with lickle flower brads. Very therapeutic!

New Address Cards

I may have had to leave (not so) little Oscar behind with my parents, but I have a new pet (well, ish!) A bunny wabbit - I have named him Robbie) keeps coming out early morning and early evening to chomp at the grass outside my lounge window. Today, however, he actually was out during the day (maybe because it was so hot?) and he lounged around on the grass for a few hours under some little bushes...

Robbie the Rabbit


He's not dead, just sleepy... aaaahhhhhhh!

Wednesday, 23 July 2008

Nail Varnish Backgrounds Fluttering By!

Finally turned those nail varnish backgrounds from 4th July...

http://freakydeakycrafter.blogspot.com/2008/07/nail-varnish-high-and-somewhere-to-be.html

... into completed ATCs!

I added gorge flutterby sequins which I had embellished myself with beads...

... and a swirly wirly die cut (courtesy of my craft penpal from the U S of A) ...

... then I stuck gems onto the die cuts to lift them off the backgrounds ...

... and used my new mini alphabet stamps from The Fruit Pixie to stamp either "soar" or "fly fly away" ...

I am liking flutterbies at the mo! Really excited as there is a butterfly themed Gothic Arch swap coming up on ATC Addicts in July/Aug... yay! :D

Sunday, 20 July 2008

I'm here!

Yesterday I moved into my new place - gulp! At the risk of sounding like I am giving an "Oscar winning thank you performance" I must say ta very muchly to Mumsy and Freaky Deaky Dad, who helped me move most of my stuff, not to mention helping me to spring clean from top to bottom and shift furniture around - rewarded them with a Chinese takeaway!

Now, here's a question for you...

Q: What is the most important part of Freaky Deaky Crafty Chick's home?
A: Craft Space!!!

Here is the "before picture" - taken first thing this morning... oh the jumble!

Then along came my fairy godmother in the shape of my Freaky Deaky Crafty Friendie, and with her magic wand and my fairy dust (plus rather a lot of shuffling things around and re-jigging me bits and bobs) we turned an area of my lounge into this...

Ta da!!!

And do you know what? My FDCF bought me a giftie, well she bought it over here, but she actually created it herself - wow! I was sooooooo chuffered; not only had she taken the time to make me an stonking altered canvas, but she even wrote the words herself - I think I shall start calling her my Uber Talented Freaky Deaky Crafty Friendie!

"A time to craft, a time to play, A time to art your heart away,

A time to get messy, and time to have fun, a time to art until you are done,

New techniques, new tools to use, experiment with them, use your creative muse..."

After receiving such a wonderful gift, and a craft space ready to rumble, how could I resist having a play?! So I made a start on an altered coaster swap for Advanced Artist Trading. Using a technique from Bernie Berlin's book, I created resist backgrounds using acrylic paints, paint dabbers, clear heat embossing with rubber stamps, more paint (dry brushed on) and then applied a hot iron...

For some reason, I didn't get quite the right effect on the top R coaster, and the bottom R one was naughty and some of the actual chipboard of the coaster came off after ironing (iron too hot?). That said, the ones on the left hand side I am well chuffed with :)

Theme for the swap is numbers, so to include my favourite or a significant no. on each coaster. So what's the magic no.? That'd be telling!

Wednesday, 9 July 2008

UTEE or not UTEE?!

Backtracking - 27th June 2008

I spent the day playing with UTEE, using playing cards as my base (ones sent to me as an RAK by a member of ATC Addicts R Us) - a couple of layers of UTEE, then quickly sprinkled over some of my new B-Muse embossing powders in....
  • aged copper
  • metallic marmalade
  • raspberry dazzle
  • creamy mauve metallic

(don't they have fab names?!)

I stamped into the molten UTEE using some new corner stamps I have been dying to try out (a gift from Crafty Chick to Crafty Chick from That's Crafty Online when I was stocking up on adhesives!)

Then I took some teeny ballerina images and stuck them into a couple of frame charms I have been saving for a special occasion - I used UTEE to glaze over, and sprinkled in some accent beads (this whole process will be so much easier when I get my melt pot - roll on 16th August!)

Used wire and beads to create a dangly to attach the ballerina pendant charms I had made, and added a bead drop just because you can never have too many beads on a project! Then I glitzed up even more by adding teeny weeny gems in various parts of the impressions that had been made by stamping into the UTEE.

This one I gave to my Freaky Deaky Friendie...

...and this one is for *me*

More With UTEE...

I couldn't accept the playing cards RAK without sending something in return that I had created on the card/s to say thank you, so more UTEE was flying around the room and I played around again, this time, trying to let the diamonds on the playing cards show through, so I went easy on the coloured embossing powders when I sprinkled them over my layers of UTEE - two of the embossing powders are scented...

  • baby powder (light pink)
  • strawberry (red)

...I wonder if they still smell after travelling to their recepient? Let me know if you are reading this guys! They certainly left a nice niff in the craft room :)

This time I inked up my stamps with stazon so as to make very bold impressions - ballerina stamp and distressed harlequin stamp - so me it looked like the ballerina was dancing on diamonds so that was what I titled these ATCs...

A finishing touch was required (I mean, how can I make an ATC with no embellishments?!) so i sought out 2 sizes of square brads, used embossing powders to make them fit in with the colours I had already created, and attached them so they looked like diamonds. Voila! I loved the colours on the second ATC so much that I submitted it to ATC Addicts R Us for the "My Favourite Colour" Swap, and got this lovely one in return:

I will credit the artist, if they are OK with that :)